
About a month ago I submitted the “Time of Day” visual assignment. I got the idea for the assignment (which is to take several picture throughout the day in the same spot, then merge them together) after seeing a cool picture online that was made using pictures taken of a coast during sunset. I attempted the assignment in conjunction with my final project by taking a picture up at the UMW battlegrounds during sunset. I wasn’t super pleased with how the assignment came out, but I learned a lot in the process and no one else has attempted the assignment, so I thought I’d create a tutorial.
Assignment modeled off of following image-

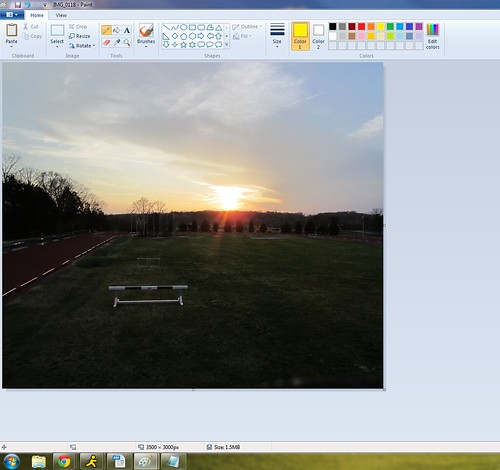
My attempt at the assignment-
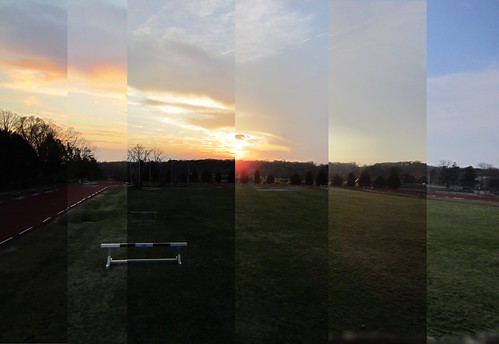
Tip 1
The first thing I noticed after completing the assignment was that something about mine didn’t look quite as good as the picture I based the assignment on. It took me awhile to figure out, but I think what this assignment needs is water. So my main advice would be to take a picture of a scene that include water, such as a local creek or river (for UMW students the Rappahannock provides a great place). The way the water appears with different light creates a very contrasting effect for the pictures, which you can clearly see above in the picture the assignment is based on.
Tip 2
While taking the pictures, have a stand or set position for the camera. Don’t simply try to hold the camera in the exact same spot with the same angle, because it will make the editing process very difficult.
Tip 3
Try to get a camera shot that doesn’t have much unoccupied space. You want some plain areas to help emphasize the changing of the time of day in the pictures, but too much blank space will lead to a bland picture.
Tip 4
Take a lot of pictures, in my final product I used only 6 pictures, but I took 29. There will be some that aren’t particularly clear or have weird lighting, so the more the better.
Editing Process
Editing the pictures is actually fairly simple, as long as you took not of Tip 2 above.
1. Once you have selected the pictures you want to use, open either the first or last one of them in your picture editing software (MS Paint for me).
2. Open either the previous or next picture (depending on whether you start with the first or last picture) in a separate tab.
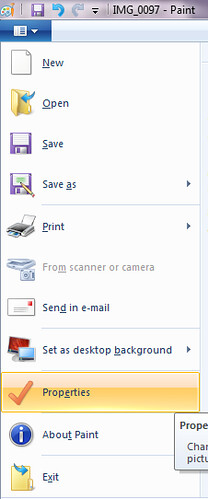
3. In most photo editors, there will be a tool that allows you to change the size of the photo. Shown below, is where you can find it in MS Paint.
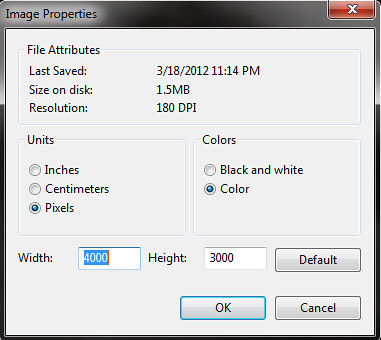
4. Once you have opened the attributes page, you will want to cut down the width of the picture by a set number. For example, if your photo is 4000 pixels wide and you want to break up your collage between 4 pictures, you will decrease the width of the photo by 1000 pixels each time. Below is the attributes screen, then the before and after shots of the truncating process.
Before-
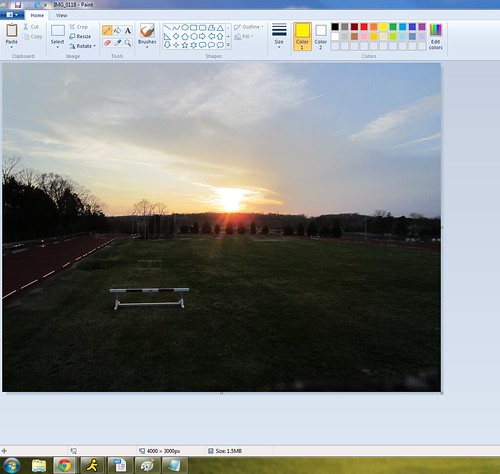
After-
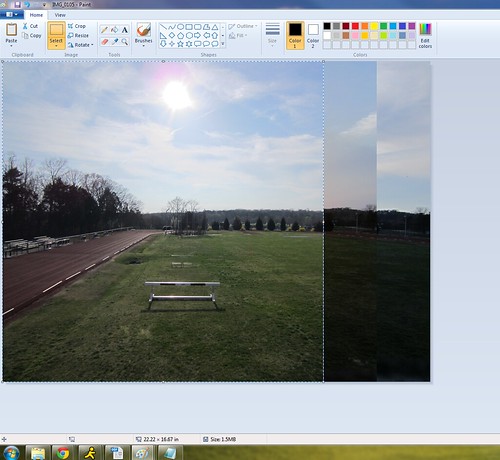
5. Once the width of the picture is decreased, select the whole image, copy it, and paste it on top of the first image. Shown below is the product of the first paste.

6. Repeat this process each time, making sure to reduce the width of the photo by an additional amount each time. So for the previous example, you would reduce the width by 1000 the first time, 2000 the second, and 3000 the third. Always pasting on top of the same work in progress picture. Below is a picture of what it would look like after two pastes.
Hopefully in a future class of ds106 during the visual section of the class some people will attempt this project, as I think it could generate some cool stuff. Also hope this method helps some people, for me it was the easiest way to complete. Also, feel free to mess around with the gaps between the pictures. You’ll notice in my attempt above I didn’t use set separations each time. I did this because it worked best with the clouds/track alignment.

Add a comment