
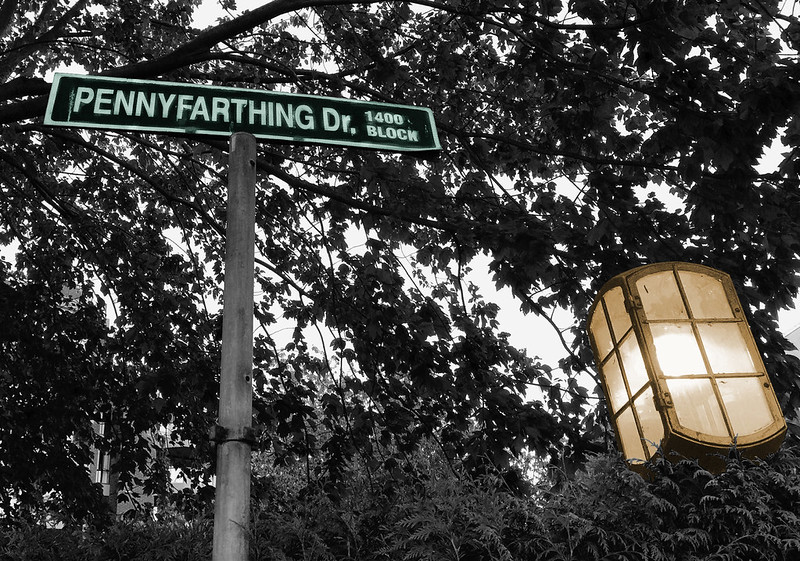
When I was out doing my design blitz in the Village the other day I discovered that there is a street called Pennyfarthing Drive in the Village. Well, of course there is.
Alternate version
I also did a red version. I’m not sure which I like better.

the process
This is really a “visual assignment” (last week) rather than a “design assignment” (this week), but oh well.
This was a problematic image to work with because it was not very light in the laneway where I took it, and there wasn’t much daylight left in the day. So the street sign didn’t stand out at all. I wanted to find some way to emphasize the sign.
First, I discovered the “burn” tool in GIMP (in the tool pane) and tried it out. I didn’t know what it did. On this b/w image it lightened things up. So I used it on the words on the sign, to brighten them.
Then, I decided to do a colour splash. This was a little tricky because I wanted two different colours, one for the sign and one for the lamp.
1. First, I duplicated the image a couple of times.
2. I added an alpha channel to the layer with the b/w image, and then used the “lasso” tool to select around the sign and then the lamp. I used Edit -> clear to delete the selection, leaving a transparent spot for each.
 3. I had two other layers with the same image. On one of them I used Colors -> colorize to colour it green, and I did the same on the other to colour it yellow. Only I discovered something: I had the lamp still selected on the yellow layer, and when I did “colorize” it just coloured the lamp, not the rest of the image. Interesting.
4. On the yellow layer I selected around the sign and did the same thing as in step 2 to make the sign on the yellow layer also transparent. That way it would show through to the green layer below it rather than showing the sign yellow.

Here’s a screenshot of the layers; the b/w on top, the yellow lamp, then the layer that got colorized entirely green.


Add a comment