
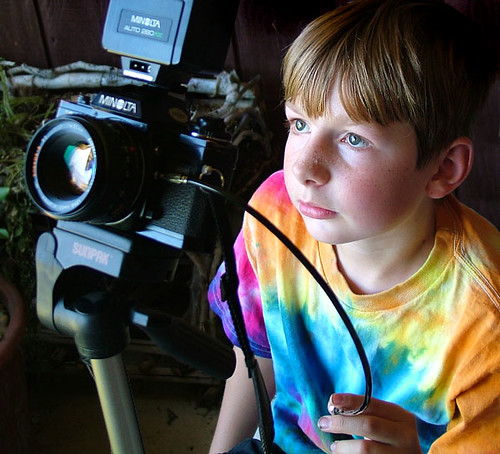
cc licensed ( BY NC ) flickr photo shared by ap.
In doing your ds106 Daily Creates you’ve already been using photography and drawing skills, plus you’ve had some practice on doing visual stories for our introduction to storytelling. In this week we go a bit deeper and give you the opportunity to practice telling stories in primarily visual form. We hope to see you got from someone who maybe takes a lot of snapshots to thinking more about composition, framing, and being more intentional with your image making. Even if you are an accomplished photographer, it is always something you can can better at by honing skills or trying new approaches.
This will also be the first week most of our work comes from the ds106 Assignment Collection – make sure that you are writing up your assignments to meet the criteria of being a Blogging Champ
How to Be a Better Photographer
These suggestions are borrowed from TEN: Ten Ways to Improve Your Craft. None of Them Involve Buying Gear a $5 ebook by David duChemin.
- Get Pickier: Instead of using your camera like a rapid fire machine gun, spend more time pre-composing in your mind. As you get more practice, you can be more selective, and more deliberate.
- Better Contrast Makes Better Stories Contrast can be in terms of colors and lighting, but also elements in your photos- look for things that maybe not belong together. Look for near and far perspective.
- Change My Perspective By Changing Yours: Find different and unique points of view. Look down, up, lay down on the ground. Seek perspectives of lines.
- Create Depth: Look for ways to add dimension of visual depth in your 2 dimensional images- play with foreground, lines, use of wide angle lenses, use of dark backgrounds
- Get Balanced. The rule of thirds is not only about placement on a grid; duChemin describes visual mass, elements that draw more attention in a photo and how to balance that effectively. “Becoming more intentional about creating and playing with balanace in your images will help you create images that are more intentionally express what you have to say.”
- Pay Attention to the Moment: Sometimes it means slowing down, but also being more aware of the action in a scene, trying to anticipate the moment of something interesting before it happens e.g. watching a family at the table preparing for when baby might spill the glass of milk? at sporting evens trying to be ready for the kick that scores the goal?
- Look to the light. Probably the most key lesson- be aware of light that works and what does not. Knowing about shadows, directions, aiming for directions where light is strong (or not). Good light makes every photo. Learn how to sense when light is good (and when not, and you can skip lousy shots).
- Use the Best Lens If your camera uses different lenses, understand better what a wide angle does versus a telephoto not only in terms of what it can fit in a photo, but what effect it has one potos (squashing or expanding space). If your lens is fixed, understand what its limits are (how close you can get, what happens at severe angles).
- Expose for Aesthetics Learn how to use aperture, shutter speed, iso to control the image- what the effects of these all play on depth of field, motion freeze vs blurring. For fixed lens camera/mobile, at least understand what the level of light means for your photos (why those low light photos are blurry?)
- Put a Great Foreground in Front of a Great Background Pay attention to the near and far. A landscape scene is dull without something in foreground to give depth and scale. Learn to avoid clutter and distracting elements.
This is of course, just general guides. You get better as you look at your own and others photos. You get better when you think more before you press the shutter. You get better when you try new approaches. You get better when you break the rules.
We’ve assembled many more resources into a web based collection on storify
We are not requiring any reports from these resources, they are reference.
But you may want to reflect what you learned or applied from them in your weekly summary– Do not just quote items from them, but look to your own photos or those of others that demonstrate these techniques. Or take a photo you did once as more of a snapshot, and redo the shot in a way that improves the photo. Show us how you are becoming a better photographer.
Photoblitzing
Here is an exercise we did in class as a fun way to try out your visual interpretation skills. We give you a series of things to capture in photos you must capture within a 20 minute window of time. In this casem it is less about capturing artistic images, but just doing what you can to be inventive. Before you do this, pick a place that is likely to have a lot of variety of subjects (middle of town or campus, your basement, whatever).
Here is what to do on for the blitz!
- Your first photo is of something that shows the current time! Document when you started the blitz.
- In the next 20 minutes, try to capture as many of the following photos as you can
- Make an ordinary object look more interesting, almost supernatural.
- Take a photo that makes use of converging lines.
- Take a photo dominated by a single color
- Take a photo of something at an unusual angle
- Take a photo of two things that do not belong together.
- Take a photo that represents the idea of “openness”
- Take a photo that expresses a human emotion
- Make a photo that is abstract, that would make someone ask, “Is that a photograph?”
- Take a photo of an interesting shadow.
- Take a photo of someone else’s hand (or paw)
- Take another photo of a timepiece that shows the time you stopped. It should be twenty minutes since step 1, right?
- Upload your five best photos to flickr, and tag them “ds106photoblitz”
- Write a blog post about your experience. Describe the place you chose to do this, and why you chose it. What was the experience like? What photos worked for you best? Give feedback/suggestions via comments for at least 3 other persons photos (you can find all the ones with this tag at http://flickr.com/photos/tags/ds106photoblitz. What were the best ones you saw in the pool of photos? Why?
See also this mobile web app developed by John Johnston that can generate a photoblitz assignment whenever you want to do one.
Daily Creates
Keep doing them! Aim to complete at least three this week. Also, for credit in participating, consider creating your won daily create assignment– how cool would that be?
Pimp Up Your Flickr
You have been using flickr for a while, but these tips will help you to use it even more effectively. See also Flickr fun tutorial by Norm Wright (and a followup tutorial for even more tips)
- Customize your flickr URL http://www.flickr.com/account/
- Set the defaults for new uploads and other privacy controls http://www.flickr.com/account/privacy/
- Post to flickr via email http://www.flickr.com/account/email/
- Set up sharing for facebook, twitter, posting directly to your blog http://www.flickr.com/account/sharing/
- Create a set on flickr, a collection of the best of your photos. Add to it every week, if you took awesome photos that week.
That last there, making a Best of Set is required. Write a blog post and see if you can figure out how to embed a flickr set into your blog post. Write about the reason why you selected those photos. Write about the story you are trying to say with any of them.
Visual Assignments
Here you will get your first in depth experience with the ds106 Assignment bank where most of your subsequent work will happen. This is a collection of assignments that have been contributed by ds106 participants. Each one has a star rating indicating how difficult/complex it is (rated from 1=easy to 5=hard).
For this week, you need to complete 10 stars worth of Visual Assignments — this could be doing 5 assignments rated 2 stars, etc. It is your choice which ones to do- there are currently over 100 of them listed, and if you need to spin the dial, try a randomly selected one. Or try ones from this recommended set of ones that have been more popular among ds106ers
- Splash that color
http://assignments.ds106.us/assignments/splash-the-color/ - Image with a message
http://assignments.ds106.us/assignments/image-with-a-message-2/ - Normal to Extraordinary
http://assignments.ds106.us/assignments/normal-to-extrordinary/ - Album Cover
http://assignments.ds106.us/assignments/an-album-cover/ - Illustrate 106
http://assignments.ds106.us/assignments/illustrate-106/ - Unlikely Intersections
http://assignments.ds106.us/assignments/unlikely-intersections/ - Common everyday objects
http://assignments.ds106.us/assignments/common-everyday-object-2/ - Find Yourself
http://assignments.ds106.us/assignments/find-yourself/ - Return to the scene of the crime
http://assignments.ds106.us/assignments/return-to-the-scene-of-the-crime/ - Art Comes to Life
http://assignments.ds106.us/assignments/art-comes-to-life/ - Buddy Photo
http://assignments.ds106.us/assignments/buddy-photo/
For each assignment you do write a blog post that includes:
- The visual you produced for the assignment, this must be embedded into your blog post.
- Write some text that shares your thinking behind the assignment, your inspiration, what it means to you. Think of this as similar to the extras on a DVD, the “making of” material.
- Share your process. What tools did you use? What techniques? Think of this as information that would help someone else doing the same assignment.
- To have your work connected back to the assignment, your blog post must include the two tags for the assignment, one will be Visual Assignments and the other will have a name like Visual Assignments324


Keep in mind that simply completing 10 stars worth of assignments is the bare minimum to satisfy your work for this week (a “C”). How you do it, and how you write it up is what elevates you. Bookmark and model the criteria for blogging like a champ.
Also note that part of your requirements for this course is writing up how-to tutorials. The visual assignments will likely be easier to document as tutorials than the later audio and video ones, so it might be worth your while to knock one or two of these off now. If you write a very complete post, it could include your assignment work and count as a tutorial. Note that there is a tutorial tag that goes along with each assignment.
And here is the nifty part- if you do not like the assignments on the site, then step up and add one yourself. This too is a requirement for the course, so like the tutorials, this is a good time to get ahead of the game.
Now go out and create some visual art!
Radio Show Project Development
You should all have logged into Canvas by Sunday, 9/23 at midnight to choose your radio group. Later today (Monday, 9/24), we will be sending out emails to each group confirming your assignments (and providing you with each other’s email addresses). This week, as a group, you need to coordinate and determine the format and theme of your show. By Sunday night, at least one group member must write a post up summarizing your discussions and decisions.
Summary Checklist for this week
Here’s whats on your check list this week. Do not forget that ongoing requirements include active participation in the ds106 community via commenting on blog posts, flickr photos, youtube videos, and communicating via the #ds106 tag in twitter.
- Review the resources for photography. We are not asking for you to parrot any tips, but try to find some things to try new with your cameras this week.
- Complete the photoblitz activity, stick to the 20 minute window. There are no prizes for how many you can do, just try. Make sure your photos are tagged, and that you write a blog post talking about the ones you felt were your best and ones from others you saw in the mix that were commendable.
- Review the suggestions for spiffing up your flickr page. Make sure you create a set for your best photos and add a few in there. Write up a blog post announcing it, and see if you can figure out to embed a flickr set in your post.
- Do at least 3 daily creates, and write a one blog summary for all your creations. Make sure you are also narrating about them too, what it meant, what the inspiration was etc. Tell a story about your photos. For particpation credit, add a new assignment to the Daily Create site.
- Complete a minimum of 10 stars worth of Visual Assignments. For each one, write up a blog post. There is no credit if you do not include everything in the requirements .
- Again write up a summary of your activity this week- including links/embeds for allt he above is a minimum. We are looking as well for a personal reflection on what you have learned this week, how you are seeing the world differently, what you learn about photography, what it means to tell a story visually.
- Write up a blog post outlining your radio show discussions and theme/format decisions (required that at least ONE person in each group write this up).
