Creating Animated GIFs with MPEG Streamclip and GIMP
Return to Tech Tutorials main page
Contents
Creating Animated GIFs with MPEG Streamclip and GIMP
First step: Getting the media
Update: The MPEG Streamclip Beta allows you to grab the video right off YouTube and trim it down right there. Pretty powerful, and it comes highly recommended. Here are some more details if you are interested. And here's an video tutorial for using MPEG Streamclip and GIMP as well.
The first thing you need to do is download the scene from the film/TV show you want to create an animated GIF from. You can download clips from YouTube using something like the Fastest YouTube Downloader. Alternatively, if you have the DVD of the media you want to use you can rip it with free software like Handbrake (available for PCs, Linux, and Mac) or DVD Fab (for the PC). Keep in mind that there are many other programs that can do this for Macs, PCs, and Linux---do a quick search including the OS you are using along with the term "ripping a DVD" and you should find a fair amount of free options. Feel free to share you discoveries in this wiki.
Using MPEG Streamclip to Trim and Export the Scene as Images
The next free tool you will need for this tutorial is MPEG Strteamclip. This video convertor and editor works on both Macs and PCs, and while it ha recently had issues with sound, it is a great option for trimming your scene as well as optimizing and exporting it to a series of images that you can then import to GIMP. Follow the steps below:
Trimming your scene
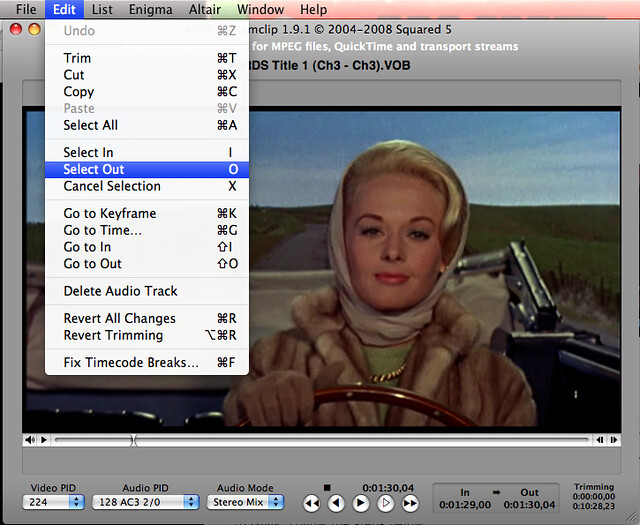
Open the scene from the film/tv show you want to animate and select a portion of that scene. What I have learned is that often the smaller the scene the better the GIF (though masking may be one way to do longer scenes, but more on that in my next tutorial). First you need to "Select In" at the beginning point of your scene:

The "Select Out" for the end point:
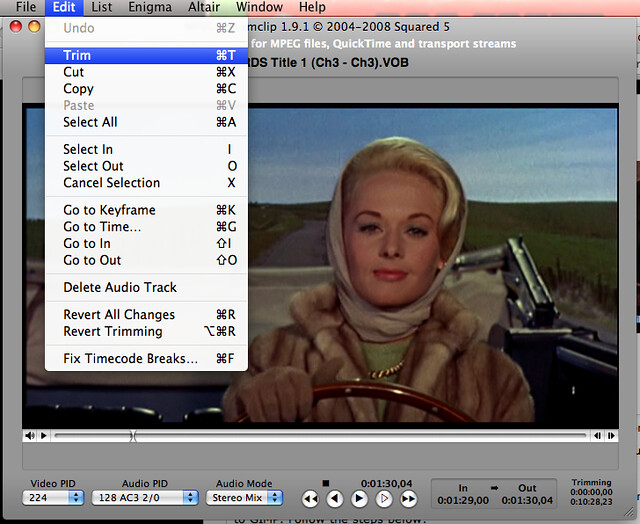
Then Trim:
Exporting the Image Sequence
Next you need to export the image sequence from MPEG Streamclip so you can bring it into GIMP and finish the deal. Below are a series of screenshots that give you an idea of the settings I use when exporting the image sequence.
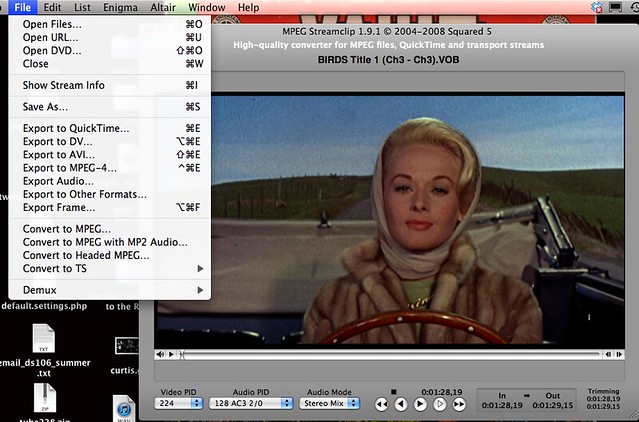
First you need to go to File-->Export to Other Formats:
After that, you need to optimize the export, here are my settings:
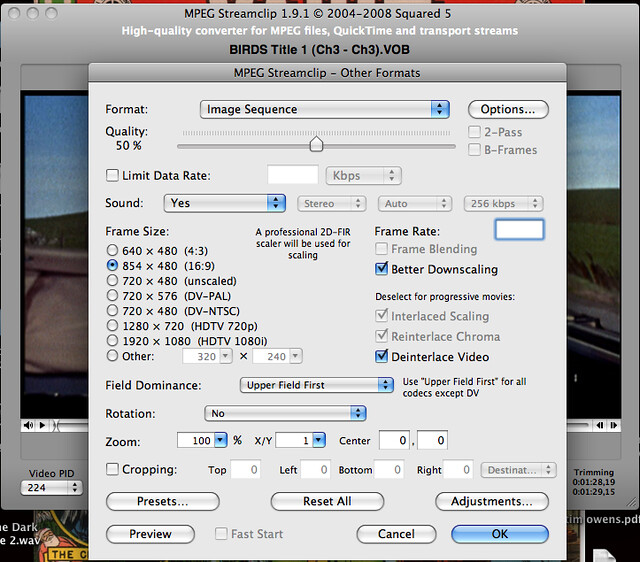
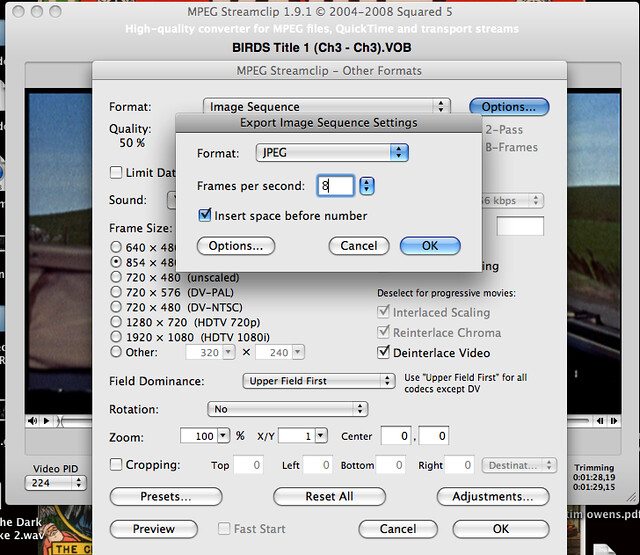
Also, you may want to change the Options for the image sequence, which basically means telling MPEG Streamclip how many frames per second (fps) and what format (I use 8 fps and JPG):
After that, you can export the image and have it download to a location of your choice (I usually put it on my desktop and work from there). One thing to keep in mind, if you have more than ten images chances are your GIF is going to be quite big in terms of file size---keeping the file size manageable is one of the hardest parts of creating a good animated GIF, and I fail at this often.
Importing your images into GIMP
Once you have trimmed, optimized and exported your images from the film/tv show scene, you can now import them into the open source image editor GIMP and work on scaling, optimizing, and animating the images. Here is how....
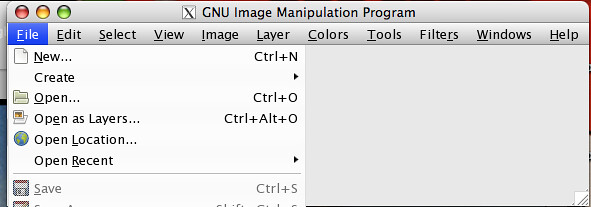
Importing images as layers in GIMP
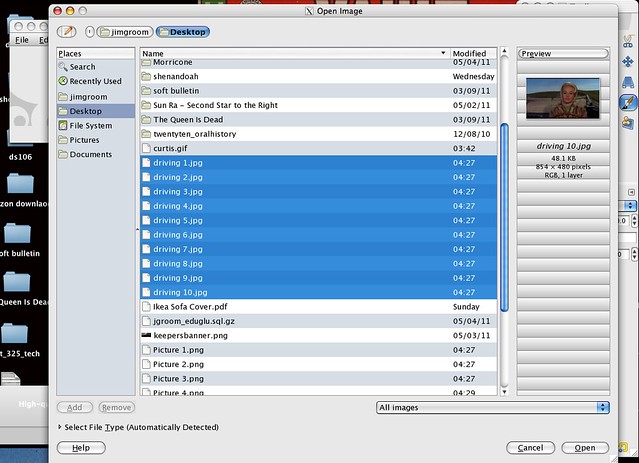
First you need to import all your images as layers. They should be numbered automatically by MPEG Streamclip, and GIMP will order them according to those numbers.
After that, select all the images in the dialogue box that opens by hitting Shift and using the mouse to select all your images (you might also be able to do this with Control/Command select).
Scaling your images
Once you have the images selected you will now be able to scale the image (if you need to). Scaling the image basically means making it smaller. My original image resolution was 854x480, and I scaled this back to 640X360. When you change the width and then click in the height field it should automatically change the height to the proper, corresponding value.
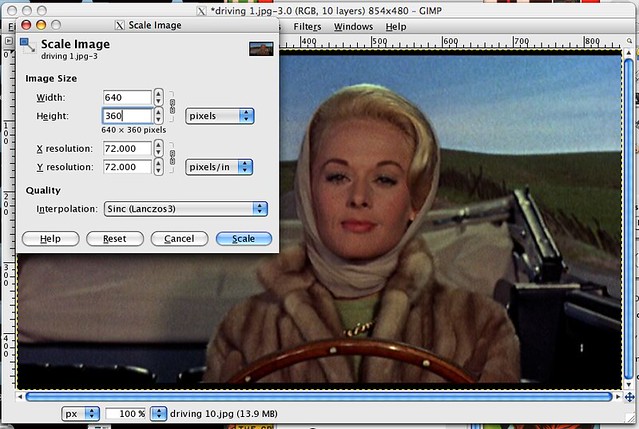
Scaling the image will make it a bit smaller, and also may give you the ability to customize it for your blog, Tumblr, etc. In my blog theme images seem to be best at 640px width.
Previewing and Optimizing Your Animated GIF
It is highly recommended you preview your animation before saving and exporting your GIF. To do this go to Filters-->Animation--->Playback and click on the playback button.

Also, you can use Filters-->Animation--->Optimize (for GIF) to optimize your GIF through further compression, which is recommended. Keep in mind that after you compress the GIF it will be put in a new GIMP window with the file name untitled.
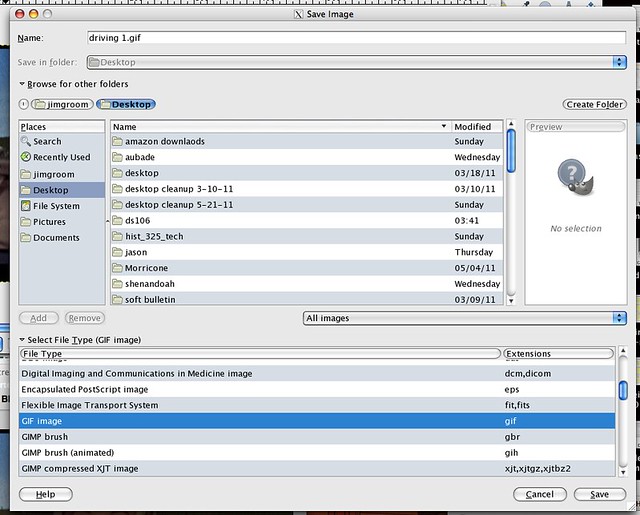
Saving the images as an animated GIF
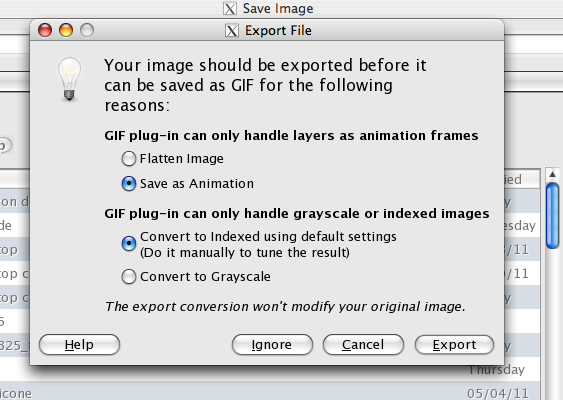
Finally, you need to now export your images as an animated GIF, and this is pretty straightforward---just be sure to use Export as not Save as when doing this. Below are a series of screenshots that take you through the process:
Once you save the image as a GIF you will get a couple of dialogue boxes, you want to make sure the "Save as Animation" radio button is selected:
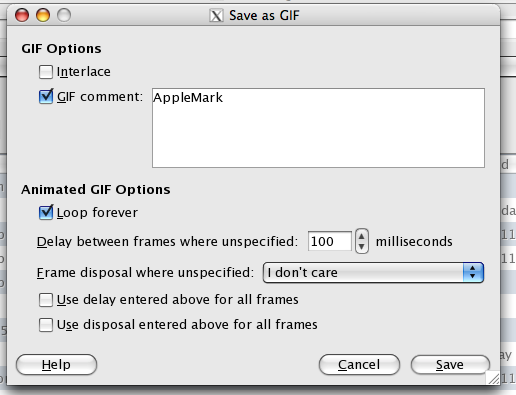
Also, you will get another dialogue box that looks like this, I leave this as is (eternal loop should be checked):
Finishing up
After that last step you should now have your animated GIF, you can see it in action by dragging it into any web browser on your machine.
One thing you may want to do is check how big your animted GIF is. If it's over 1 MB is may load slow for folks. That said, I wouldn't kill yourself over this, figuring out size and making a good animated GIF comes from practice. Play with optimization through tweaking the settings in the tutorial above. Also, under the Filters-->Animation menu there are some options for Optimizing animations. Problem is I haven't gotten this to work where it makes a real difference in terms of the file size. I'll continue to play with that, but would love any advice from someone who may have figured this out already.
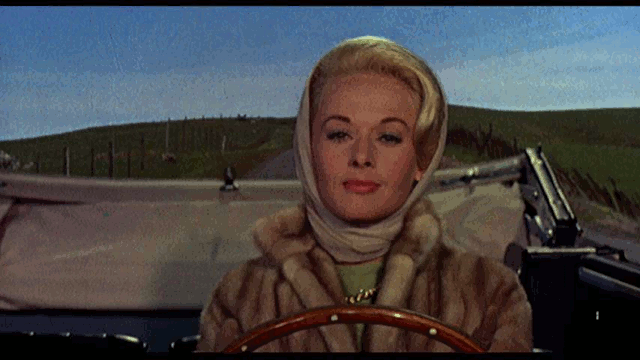
The Animated GIF
And, here is my animated GIF:
See Also
- Jim Groom's Screencast on using masks to isolate animated regions