Creating Animated Movie Trading Cards Using GIMP
Contents
- 1 Overview
- 2 Creating an Animated GIF
- 3 Importing Animated GIF into GIMP
- 4 Importing Movie Trading Card Template into GIMP
- 5 Masking Trading Card Template
- 6 Scaling Trading Card Template Layer Size
- 7 Crop to Selection
- 8 Editing Movie Trading Card Template
- 9 Duplicating Template Layers
- 10 Merging Down Template Layers
- 11 Previewing the Animation
- 12 Saving and Exporting your work
Overview

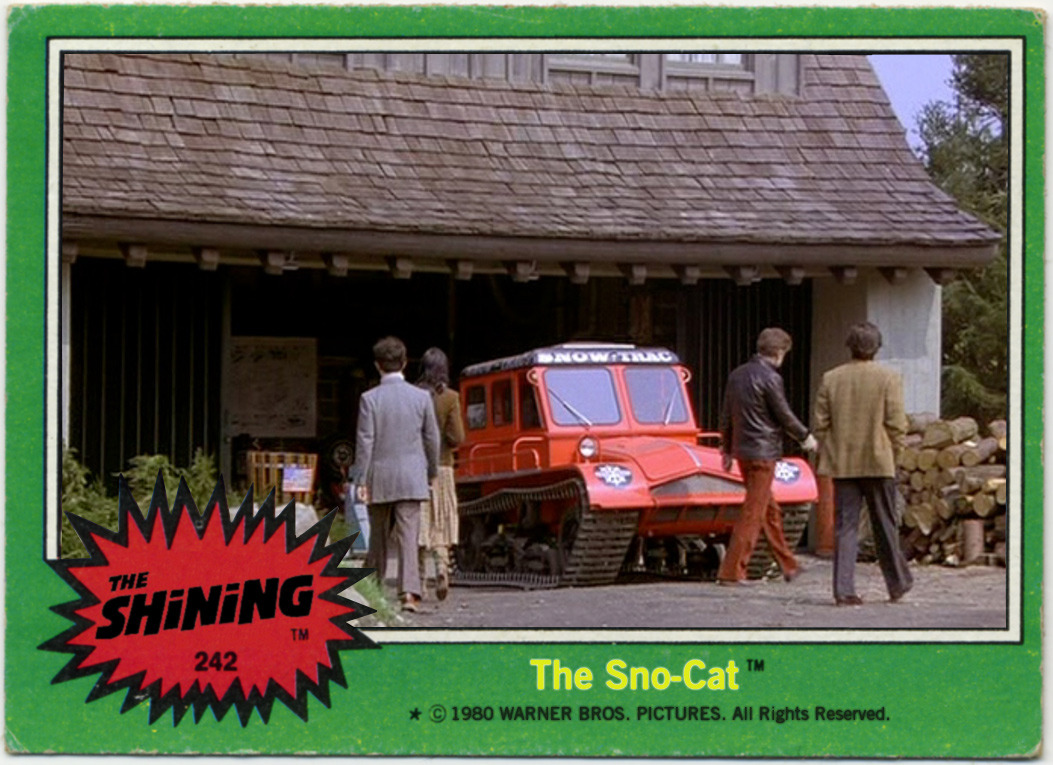
This is a tutorial for the ds106 Animated GIF Assignment "Movie Trading Cards—now with more animation!". This assignment asks you to pick a shot or scene from one of your favorite movies and animate it for an imagined series of trading cards for that movie. This assignment is inspired by the still version of the Sno-Cat trading card from The Shining.
Creating an Animated GIF
For the purposes of this tutorial we're going to assume you already have created the animated GIF you want to use for your trading card. If you are not clear on how to make an animated GIF, try this tutorial which takes you through creating an animated GIF with MPEG Streamclip and GIMP. If GIMP and MPEG Streamclip don't appeal to you, there are innumerable resources on the web for accomplishing this task.
Importing Animated GIF into GIMP
To get started, open GIMP and import the animated GIF you will be using for the Animated Movie Trading Card. To import the GIF file go to File-->Open and select the GIF file you want to work with. Once you have done this you should see the layers of the animated GIF in the layers dock as illustrated below.

Importing Movie Trading Card Template into GIMP
Once you have imported the GIF, we recommend importing a template for a movie trading card to make the process a bit easier. You can download and import this card as a template if you like. For the sake of this tutorial we'll be doing just that. Go to File-->"Open as Layers" to make sure that the template file opens up as a distinct layer within your project.

When you import the template be sure the size is roughly inline with the size of your animated GIF files in terms of width and height dimensions. They don't have to be exact, but if the card template or animated GIF layers are either too big or too small it will create an issue with viewing the entire project. In the following example the trading card template was too big for the project so we need to resize it.

To fix this, go to Image--->"Fit Canvas to Layers" to ensure the work area displays all the files adequately.

Masking Trading Card Template
Once you have the trading card template set, you need to add a transparent mask to the pre-existing image on that layer so that the animated GIF layers you will be using will show up in the featured still area (basically making the area where the Sno-Cat is transparent). What you need to do is make sure you are using the select tool and that the layer with the trading card template is selected. Ensuring that, select the rectangular area of the still image (feel free to cut through the star-shaped textbox in this example) and then go to Layers-->Mask-->"Add Layer Mask."

After this you will get the following dialog box, make sure the "Selection" radio box is checked, as well as the "Invert Mask" radio box.

The area with the original image on the movie trading card template should now be transparent and show through to the animated GIF layers. Looking something like the illustration below. If this is the case, be sure to go to Layer-->Mask-->"Apply Layer Mask" to apply the mask.

Scaling Trading Card Template Layer Size
Next thing you may have to do is scale the trading card template to fit cleanly on top of the GIF layers to make sure it looks convincing. You can do this by making sure the trading card Template is selected and use the Layer-->"Scale Layer" option to change the size of the template layer.

Also, the move tool (the icon is a 4-pointed arrow) in GIMP will allow you to move and align the template on top of the the GIF Layers for optimum effect.
Pro tip: when working on a specific layer in GIMP that you want to enlarge or shrink you need to scale it though the Layer menu, not the Image menu. Scaling through the Image menu will enlarge or shrink all the layers of the image, not just one--- hence the power of layers.
Crop to Selection
The last thing you might have to do is crop out an excess template or GIF layers once you have everything aligned and setup. Use the Select tool to select the area of the card you want to keep. After that, go to Image-->"Crop to Selection" and all the layers will be crop to the desired size (that means the template layer and the animated GIF layers).
Editing Movie Trading Card Template
Once you have the template lined up cleanly on top of the animated GIF layers you can now add an image-title for the movie in the lower left-hand corner to hide the remnants of the star-shaped text box as well as add some text to the card template beneath the animation. Here's how:
Adding an Image-Title
To add an image-title find the iconic title for your film online and download it to your desktop. Then simply go to File-->Open as Layers and import it into your project.

If it's too big you can scale just that layer---just make sure the right layer is selected---to fit cleanly on your Movie Trading Card. Once you have scaled it (Layer-->"Scale Layer...") to the proper size, use the Move tool (the icon is a 4-pointed arrow) to move it to the lower left-hand corner for the professional trading card effect.

Adding Text to Movie Trading Card Template
To add text beneath the image area, make sure the Movie Card Template is selected and click on the Text tool (the icon looks like a big capital "A"). A dialogue box will appear, you can write the text you want in the text box provided. On the Tool Channel dock you can adjust the font type, color, and size (in this example we used the font Impact Condensed at 35 PX, and an off-white color). You can use the Move tool (the icon is a 4-pointed arrow) to align and place the text exactly where you want it.

Duplicating Template Layers
Once you have the card template exactly as you want it, you are going to need to duplicate it for each layer of the animated GIF. For example, if your animated GIF has 15 layers, you will need to duplicate the template 14 times, and place one above each layer of the animated GIF layers. Use Layer-->Duplicate or the duplicate layer button in the Layers channel to do this.
Merging Down Template Layers
Once you have duplicated all the copies of the template and placed one above each animated GIF layer, you can now merge down the template on to each GIF layer individually. If you have 15 GIF layers, you should also have 15 template layers, and you will need to select each template layer individually and then go to Layer-->Merge Down and combine each template layer with each GIF layer. Once you have done this you will have you animated Movie Trading Card.

Previewing the Animation
Before you save and export the GIF, you should preview it to make sure it looks the way you want it. To do this go to Filters-->Animation-->Playback.

This will give you a pop-up window that allows you to play your GIF to make sure all the layers are in order.

Saving and Exporting your work
Finally, once everything is the way you want it, go to File-->"Save As" and save the file as a GIF. Be sure to select "Save as Animation" and "Loop Forever" in the following dialogue boxes to make sure the file animates.If all goes well, something like the masterpiece that follows should be your final product :)
