Setting Up Your WordPress Blog
Return to Tech Tutorials main page
Contents
Setting Up Your WordPress Blog
Once you have pointed your domain to the web hosting account, and the two are working, you can then start to setup applications on your web hosting space. This tutorial will take you through logging into the control panel for your web hosting account (also know as CPanel) and using a quick and easy method to install a blog.
Before you can proceed, make sure you have purchased a domain name and Web space and that your domain is pointing to your Web host. If you haven't completed these steps, please see the following tutorials:
Logging into CPanel
The majority of your management of your Web space will begin with a control panel that you have access to called "CPanel." To get to this control panel, you simply append "cpanel" to the end of your domain name.
For example, if my domain is http://YOURDOMAIN.com, I would go to http://YOURDOMAIN.com/cpanel and login with the username and password I used when creating my account at Cast Iron Coding.
Once you are logged in, you should see the following screen:

This is CPanel, and it is basically your dashboard for the piece of a server you are managing. It's a user-friendly interface that let's you upload files to a server, administer security settings, create email accounts, add-on domains, manage an email list-serve, create databases, and, as you'll see shortly, quickly install applications for blogging, content management, forums, and various other tools.
Setting Up a Sub-domain
The first thing we'll be doing to create our blog is making a space for it by defining a "subdomain." Subdomains are basically a way of parceling out your domain name. For example, if your main domain name is YOURDOMAIN.COM you can create a "blog" subdomain that would result in a new URL called "http://blog.YOURDOMAIN.com." With a basic account at Cast Iron, you can create up to 5 subdomains.
1. To create a subdomain, you need to find and click on the Subdomain icon (pictured below).

2. Once you do that, you will need to add a title of your subdomain, it could be something like "blog," "site," or whatever else you want, just make it one word, and you might also consider making it relatively succinct and easy to remember.

3. Then click the create subdoamin button, and once it successfully creates the subdomain you can return to the main page of CPanel.
Setting Up Your Wordpress Blog
The next step it to actually install the blogging application, Wordpress, in your Web space.
1. In CPanel, find and click on the Fantastico Deluxe icon (a blue smiley face) under the Software/Services section (see below):
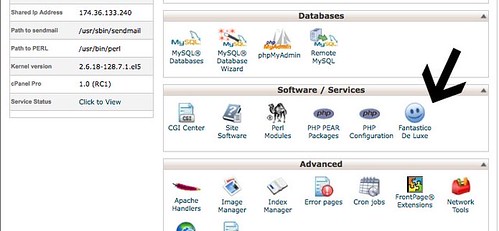
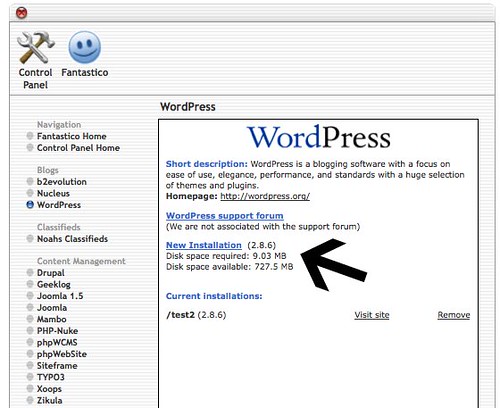
2. Once in Fantastico, you will see a wide range of applications you can install on your web hosting space. For the moment, look for the WordPress link, and click on it.

3. Click on the "New Installation" link.
4. Now go through the quick setup, install your blog in the subdomain you created above and add your username, password, and email information accordingly.

5. After you click the install button, you will be shown the details of your install. And once you click the "Finish Installation" button you will be taken to a final screen that will provide you with a field for an email address to send the details of the installation, I recommend you do this.
6. After that, you should be able to go to subdomain where you installed WordPress and view your blog, for example http://blog.YOURDOMAIN.com/. This url will take you to the "frontend" of your blog (what the whole world can see).
In addition you can access the "backend" of your blog by appending "wp-admin" to your blog's URL. For example, "http://blog.YOURDOMAIN.com/wp-admin." This is the space you go to in order to manage your Wordpress blog, write posts, install plugins, etc.
For more information about using Wordpress, see the UMW Blogs support material that provides a step-by-step guide to WordPress here.