
Welcome to my DS106 Tutorial on how to create a drawing! If you’re unfortunate, like myself, and don’t have Photoshop, don’t sweat it. This quick tutorial is going to make using GIMP as easy as possible for all you new DS106ers! Now most of you may have clicked this by going through the “Draw it.” assignment and seeing the tutorials…So you must be aiming to get the 2 stars for the assignment, woohoo!
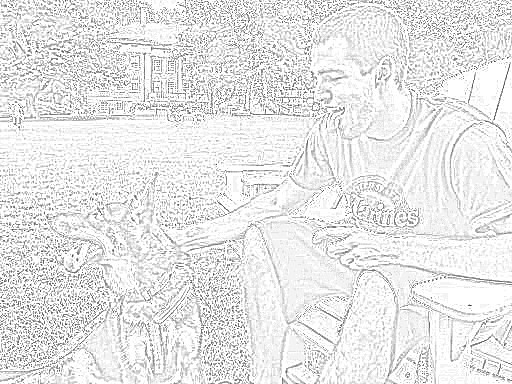
I also did this assignment, A Man and His Dog, and understand the frustrations of using GIMP and other new programs. The Internet is a big help with answers/tutorials, which also helped me with my own assignment. So relax, take a deep breath and get ready to draw!
(If you can’t wait to read and just want to follow pictures, here is a slideshow of the tutorial)
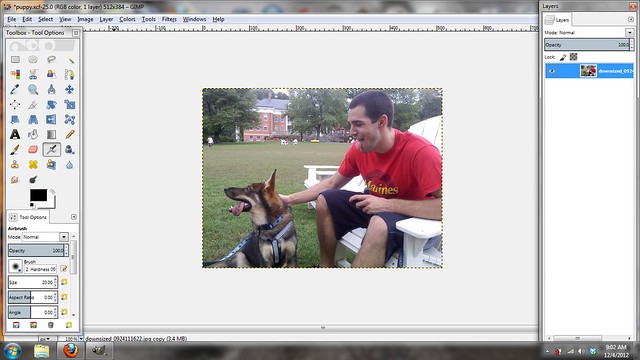
Step 1 – Start with a picture. It can be a picture of ANYTHING! That’s the best part about art, you make what YOU want! Open the picture up in GIMP.
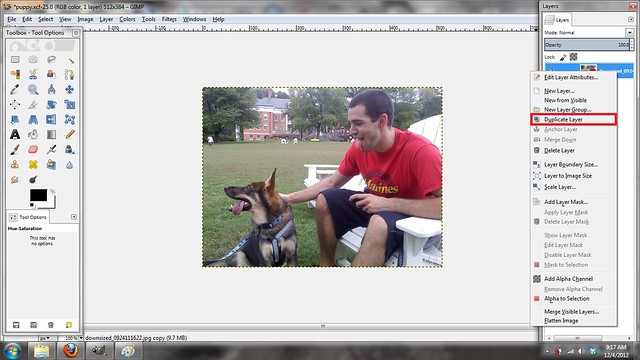
Step 2 – Duplicate your layer. You can do this by right clicking on the layer in the layers window and then clicking Duplicate Layer. This is a good practice because you will always have your original photo and won’t edit over it by accident. I learned my lesson in my old Photoshop/high-school days!
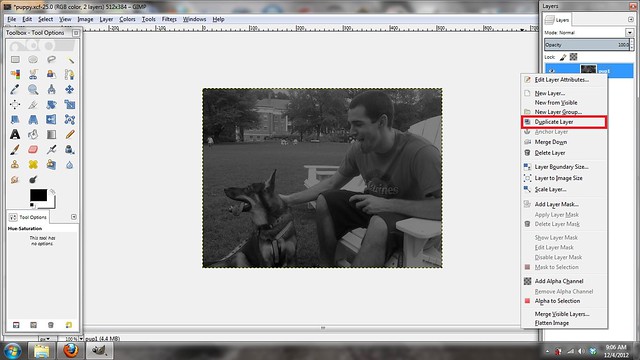
Step 3 – Make sure that you have your new copied layer selected in the Layers window, and then proceed to go to Colors on the toolbar. After the dropdown, select Hue/Saturation. A new window will open and you will want to drag the Hue/Lightness/Saturation bars all to the left. This will result in a seemingly black/gray image.

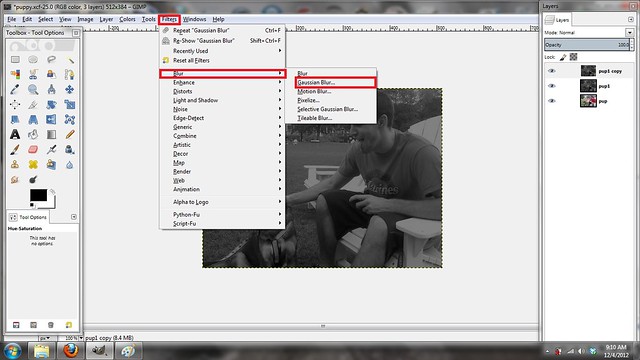
Step 4 – Just like in Step 2, we are going to Duplicate the black/gray layer from Step 3.
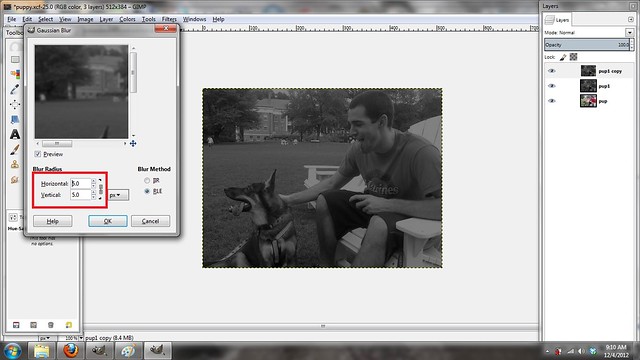
Step 5 & 6- Making sure you have your newest copy(should be the top black/gray layer) selected in the Layers window, go to Filters, down to Blur, and then select Gaussian Blur. This is just a generic blur that I used. (If you wish to play around with GIMP or your drawing assignment, select another blur and see what you get!) A box will appear and you will want to select how much of a blur you would like to apply. I chose 5, but once again, you can get creative!
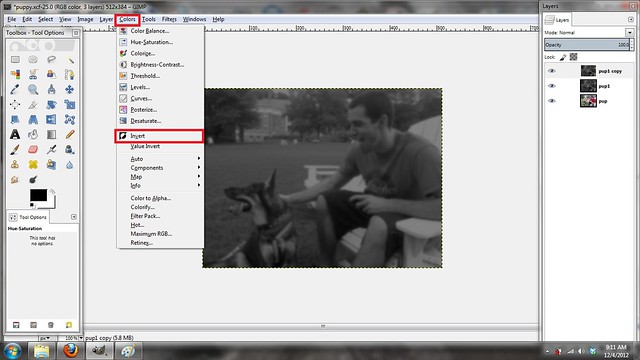
Step 7 – Continuing to use the same layer, go to Colors. Then choose Invert.
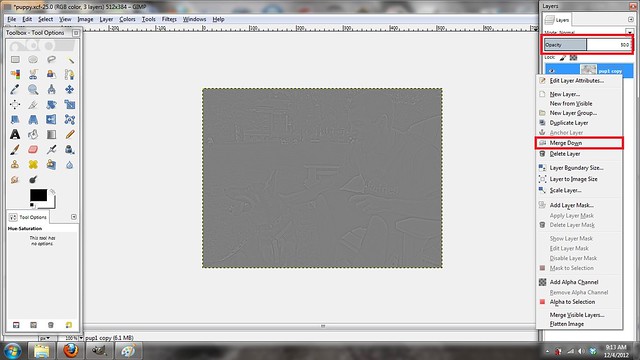
Step 8 – After you invert, you need to change the Opacity of that layer to 50%. This is located near the top of where your layers are located. Once you change the Opacity, you will then right click the layer in the Layers window and choose Merge Down.
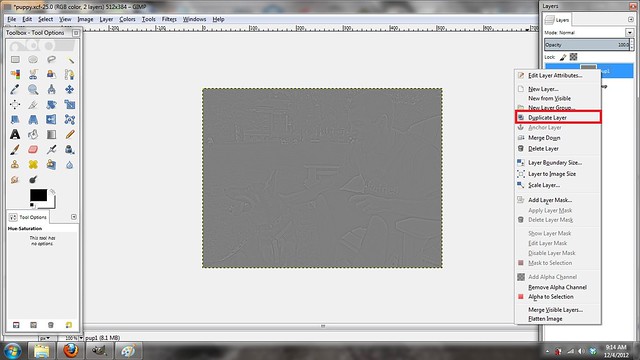
Step 9 – Great, now you have a gray blob. What do you do with a gray blob?? Duplicate that layer as you have done with previous layers.
Step 10 – Lastly, go to the top of your Layers window. With the newest copied layer selected, change the Mode to Dodge.
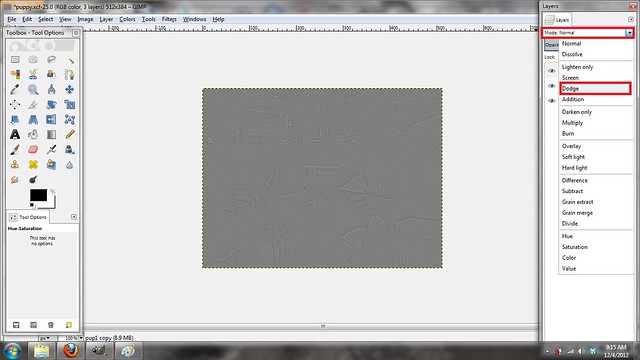
This should result in a “drawn” looking image! Congrats on receiving your 2 stars! Now go blog about your creation and don’t forget to mention me! On my final image, I wanted it to have sharper edges and more “drawn” looking qualities, so I played around in GIMP until I was satisfied. Have fun creating!

Add a comment