
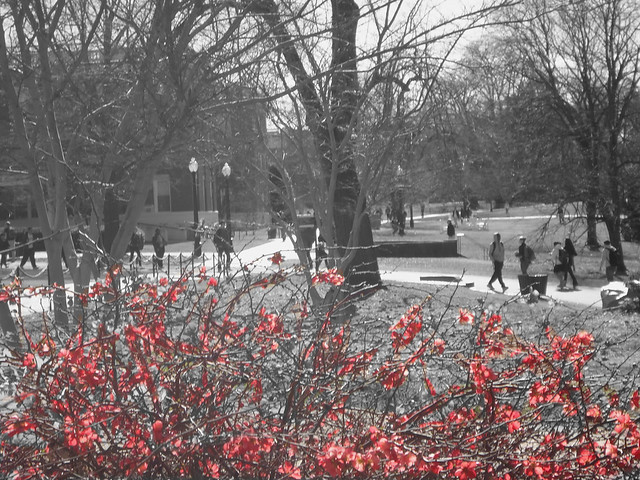
I was on campus today and had a 3 hour break between two classes. For once, I had no work to finish up. Well, at least work that I had with me at the time. I decided to take the opportunity to walk around campus and take pictures of random things that I thought were interesting. My adventure took me past the Judicial building, where the landscape was surprisingly dull. One my way out, I saw a series of red bushes which stood out a great deal so I decided to take a picture of them. After snapping the picture, I realized that seeing a guy walking around in a trench coat with a camera (a pink one, nonetheless) lurking in bushes catches students attention.
Then I remembered the visual assignments for this class and figured I might be able to knock some out with my new pictures. For my first official Visual Assignment, I decided to take care of the Color Splash option and came up with this.
What I used:
You can use multiple tools to make this effect. I wanted to use photoshop, but I realized did not have access to it on the campus computers and started to cry. I was excited to get this done. HOWEVER! Hope was not lost. I decided to try out Picnik for the first time and I was pleasantly surprised. It is very simple to use, however, below is a tutorial on how to apply this effect if anyone has any questions.
Tutorial for Color Splashing
1. Once on the Picnik website and upload the picture that you want to edit from your computer.
2. Once the photo is finished uploading, you will see a multitude of options. You only need to go to the “Effects” option on the top bar.
3. Then click on the option “Black and White”. This will do what it implies, convert your color picture to black and white.
*Note* This may seem silly to state, but make sure that the photo you are uploading is indeed a color one or else you will not be able to continue with restoring the color in the next step.
4. The last step. After you click on the Black and White option, a side menu will appear. Congratulatons, your now in Paint Mode! Two tabs should be available, Effect and Original. Make sure it is in original because the whole purpose of the painting is to restore the original colors to specific items. Then adjust brush settings if need be, and get to painting. You can also play around with the other features to see what interesting things you can do to it. For example, I played around with the shadows and contrast.
*Another Note* Brush size can be important. If your dealing with small details, make sure your brush size is also small or else you will be painting items that dont want to be emphasized.

Add a comment