Recently, I’ve discovered that my although my time at this specific domain will come to an end, that doesn’t mean that all my blog content will be lost! Good news to fellow bloggers who are looking to move to new sites… whatever the reason may be! I’m here to share the easy and fast way to save and transfer your information to a different site. For this tutorial, I will be giving steps on how to move from your current WordPress site to another, free WordPress site. These step by step directions should be helpful in making your shift smoother! ![]()
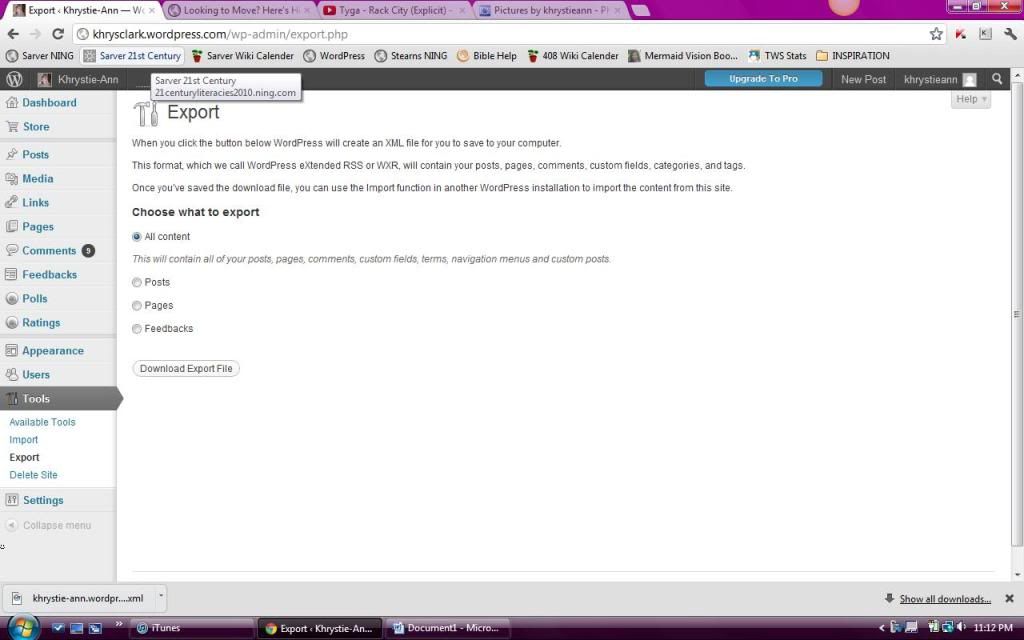
Firstly, access your the “Dashboard” on your WordPress account. Here you should find a “Tools” option on the left sidebar – it’s the third one from the bottom. As you hover your mouse over this link, three options should appear. Click “Export” to begin!
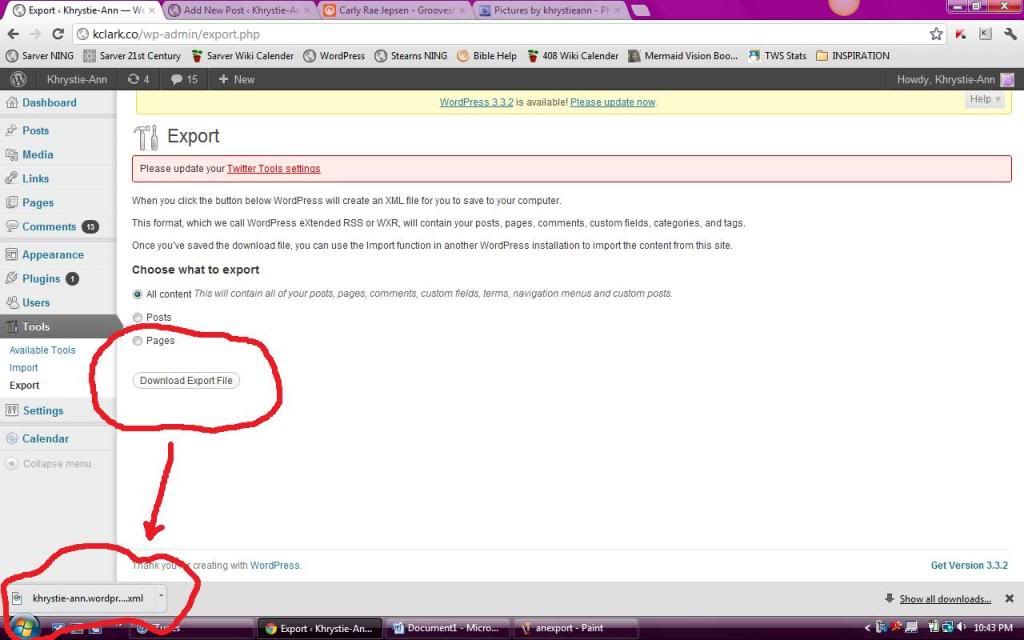
From here, you can choose to export all content, pages or posts. For my purposes, I chose to export all content. Make sure to click the “Download Export File” when you make a decision. After a short wait, your downloaded file should appear in the file you’ve saved it in! In the following picture, the red arrow indicates where my computer automatically places all downloads… many of your computers may do the same!
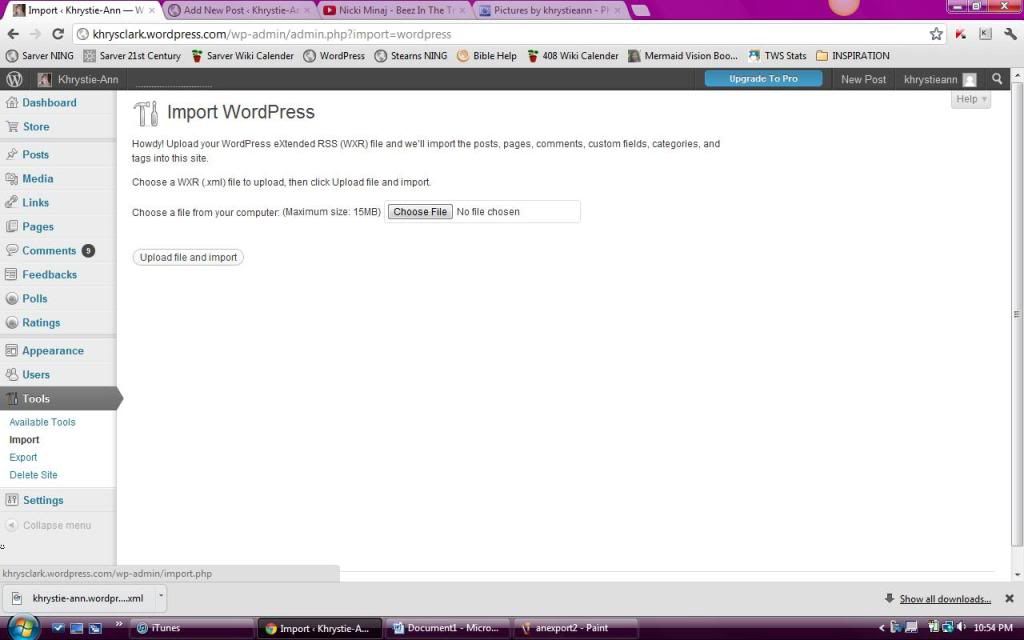
Next, sign up for a new WordPress account! After you have signed up and created a new site, go back to the “Dashboard.” This time, while hovering over the “Tools” button, click the “Import” option. There will be list of different blogs, but for my purposes, I chose the WordPress option. You should be brought to this page:
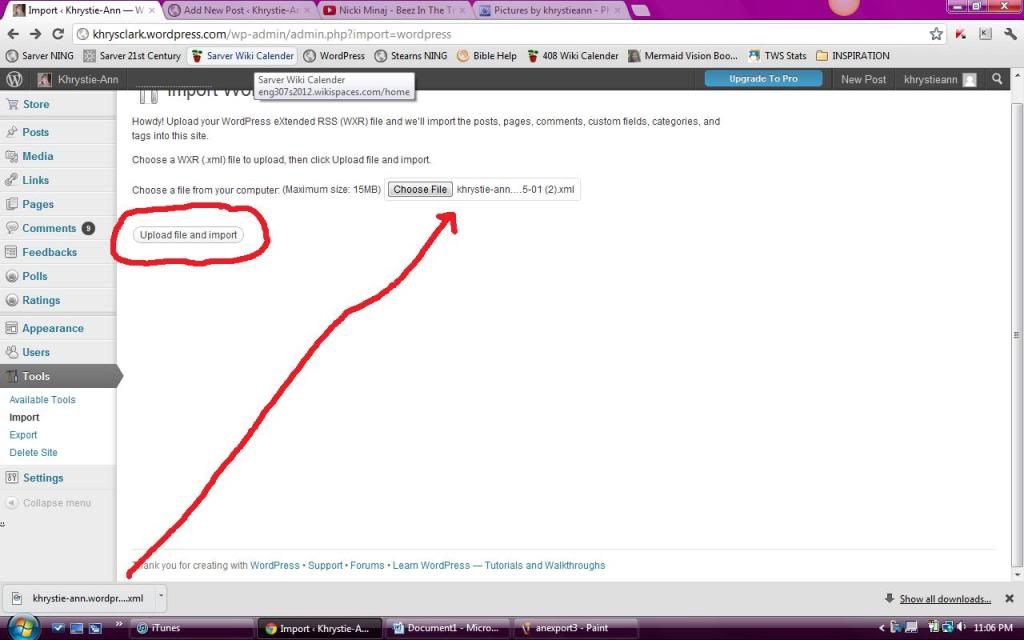
Almost done! At this point, just choose the file where you exported your content. If your computer is like mine, you can drag and drop your downloaded export file from the bottom bar on your screen up to the “Choose File” box. Allow some time for the content to import… when it’s finished, all of your information should be there!
Congrats… you’ve just transferred all your information! From here, you can customize your new space and present your content in all new ways. Enjoy blogging on your new site and I hope this tutorial has helped!


Add a comment