
Do you get to do that in your fancy MOOC? What more do you need to know to be part of ds106? And the beauty is, you can start this creative experience at any time. You are never behind, or missing out on some quiz to get some chips.
I digress.
I thought this photo along was pretty funny- on my Tuesday bike ride, I was looking for some good cowpies (do I really need to explain what they are) adjacent to the forest road, and I noticed one was draped kind of funny over a rock. It was not until later when I was looking at my photo that I was amazed that there was a face in it, almost like The Scream!
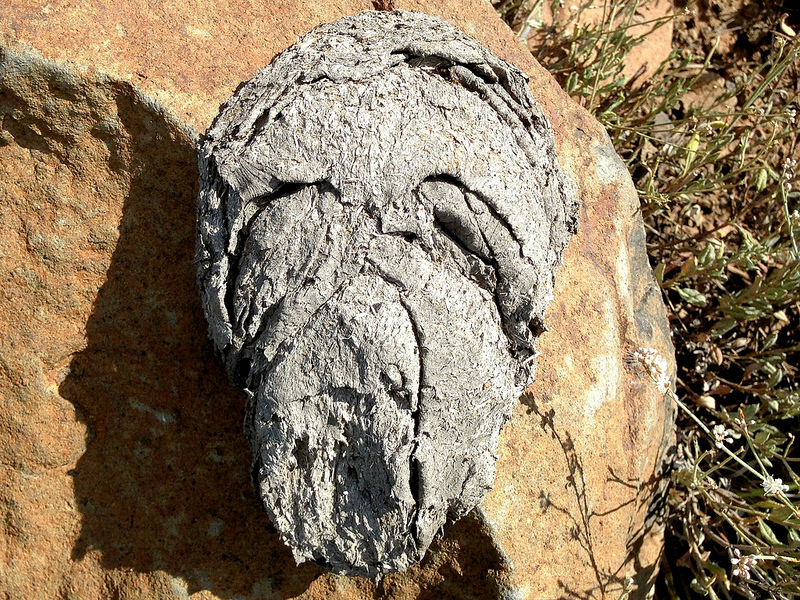
cc licensed ( BY SA ) flickr photo by Alan Levine: http://flickr.com/photos/cogdog/9667370443/
But after sharing it via twitter, I got a request from Bill Fitzgerald
@cogdog @patlockley I need a version of that as an animated gif.
— Bill Fitzgerald (@funnymonkey) September 5, 2013
How could I not respond? I was asked to animate some cow poop!
This was just thrown together (ewwwww)– my idea was to make the face wink.

It’s just three frames. I made it in PhotoShip CS5.5, first importing the photo as a base image. I made a copy of the layer, made a lasso selection around the eye, then inverted the selection, and deleted. The plan is to isolate the part to animate as a separate layer.

Create a copy layer and delete everything but what will animate.
This is going to move around so I need to go back to my base layer, and use the clone brush to paint in a surface behind the eye. It does not have to be perfect because it will be mostly covered., but since the eye will change shape we want a neutral backdrop.

Clone brush in the area behind the eye.
Now I make a copy of the eye layer, and use the Edit — Puppet Warp tool.

Using the Photoshop Puppet Warp
I only started dabbling with this last year, but offers a way to distort a selection in a way that is more like pushing clay around, and suitable for changing the shape of this eye over a few frames.
Photoshop puts a mesh on the selection, and I click a few anchor points:

The mesh and selecred edit points in the Puppet Warp tool
I cannot say for sure the best strategy. You will need more points near where you want to make movement. On my first one I should have put more at the bottom like this to keep it anchored. But if you click and drag on one of the yellow points, it starts mashing the object around. My idea was to squeeze the top of the eye down as if it was winking:

The puppet warp was used to squeeze the eye down form the original
I then made a copy of this distorted frame, and repeat to make a third one, eve more squeezed down. I can check my effect by toggling layers on and off- I decided to use the brush eraser tool to remove a bit of fringe.
Now that I have a background layer as a base, and 3 versions of the eye as separate layers, I am ready to animate. In CS5.5 there is a menu in the upper right of the animation window, and I use the Convert Layers to Frames item.
What I get is each layer in its own frame- not quite what I need. I can delete the first frame with just the base layer, and in the others, I just toggle on the visibility of that layer so it stays as a background.

Layers and animation in PhotoShop
I select all the frames in the animation window, and change the frame rate to 0.5 seconds. Then save for Web & Devices as a GIF, and I am done.
As a final GIF it is only 278k. When you have just a few things in a layer, it is a lot less disk space to save then if each frame is a full image. By isolating movement, you get not only a more subtle animated GIF, it weighs a lot less.
If you want to look at the source file, download the PSD (2 MB).
How much more fun can you have?
I’m tagging this for a Say It Like Peanut Butter assignment (though technically it is not a movie scene) (what am I going to get into TROUBLE?)

Add a comment